Edit Shelf View
Edit Shelf View
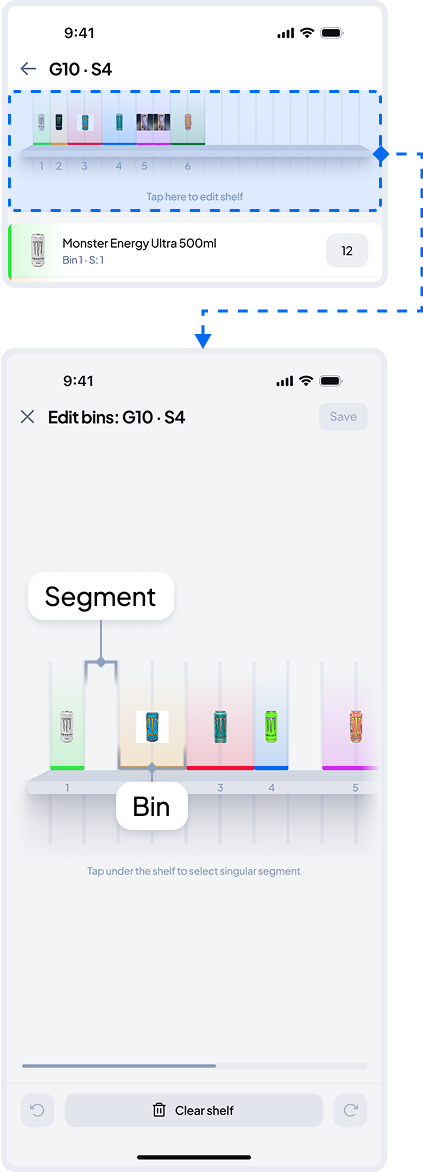
This view lets you add, edit, and resize bins, replace products, and make detailed adjustments to accurately reflect the real layout of each shelf.
To open the Edit Shelf View, tap the top visual representation of the shelf in the Shelf section.
You can perform as many actions as needed in this mode — nothing will be saved to the system until you tap Save in the top-right corner.
Each shelf is divided into several to dozens of segments, separated by vertical lines. You can scroll left or right to view the full shelf.
A bin is a virtual representation of the space (measured in segments) that a product occupies, helping the system better detect product interactions.
You can undo or redo any completed action at any time — no confirmation is needed, allowing for fast editing.
If no bin or segment is selected, a single tap lets you clear the entire shelf.
Two or more operators should never perform actions on the same gondola at the same time.
Selecting
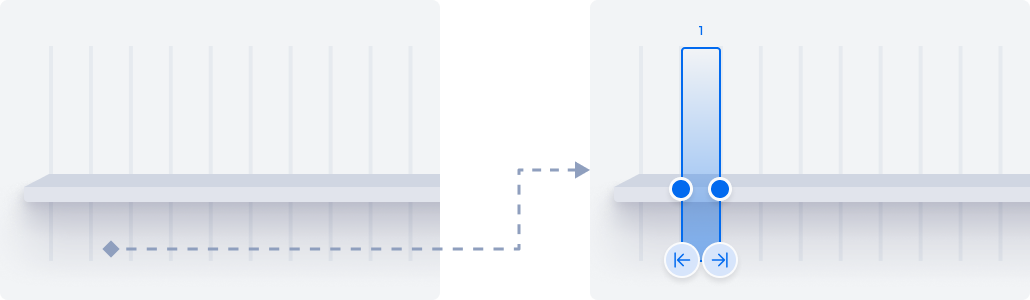
To select a single segment, tap below the shelf. If there are no bins above, you can also tap above the shelf.
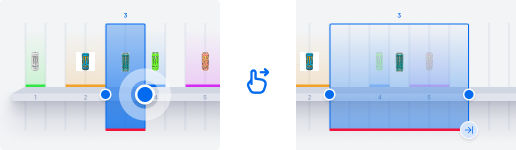
To select a bin, just tap on it above the shelf.
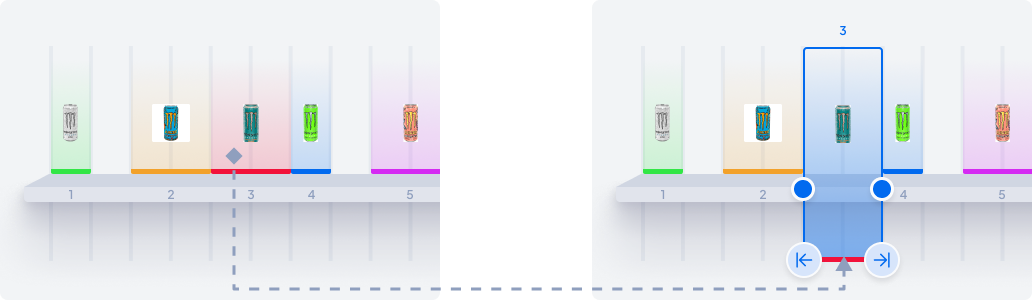
Tap, hold, and drag blue dots across segments to select multiple adjacent ones. You can lift your finger, scroll the screen, and then resume extending the selection. Actions on overlapped bins will overwrite their content.
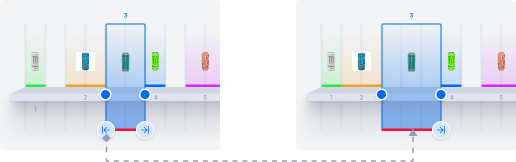
If you see left/right arrows at the bottom of a selected bin, it means you can extend it by pushing adjacent bins — without overlapping or overwriting them. This option is available only if there’s at least 1 empty segment between bins. Use it to fine-tune empty space or quickly extend a bin by 1 segment.
Actions
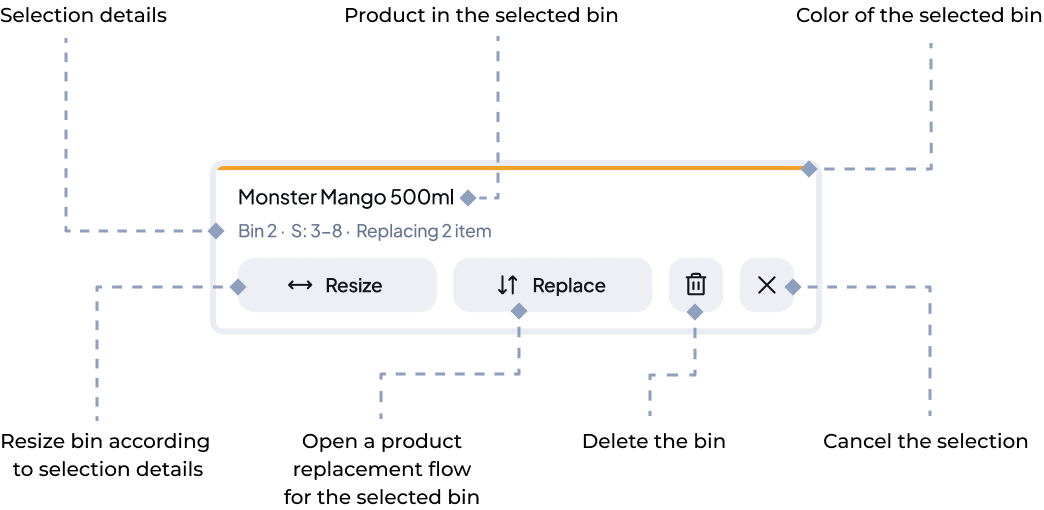
When you’re in the Shelf Editor, the bottom bar always shows context-aware actions based on your current state or what you’re trying to do. You’ll only see actions that are available at that moment — nothing extra, and you’ll also always see information about your current selection in that area.
For example, if you haven’t changed a bin’s width, the “Resize” action won’t appear. But as soon as you adjust it, even by one segment, the option will become available.
Let’s go through all the available actions.
Default mode
If no bin or segment is selected, you can quickly undo or redo your last action, or clear the entire shelf to start over from scratch.
The editor returns to its default state after each completed or canceled action.

Selection mode
In selection mode, all available actions instantly apply changes without confirmation. We designed this to save you time — every action can be undone with a single tap, and nothing is saved on the server until you tap Save.
You can’t undo a selection by tapping anywhere — you need to deliberately tap the “X” to cancel it.
Resize
Resizing is instant and changes the number of segments a bin occupies.
- If the new bin fully overlaps existing ones, the products in those bins are considered removed from the shelf.
- If it only partially overlaps them, the products are treated as moved to the remaining segments of the original bins.
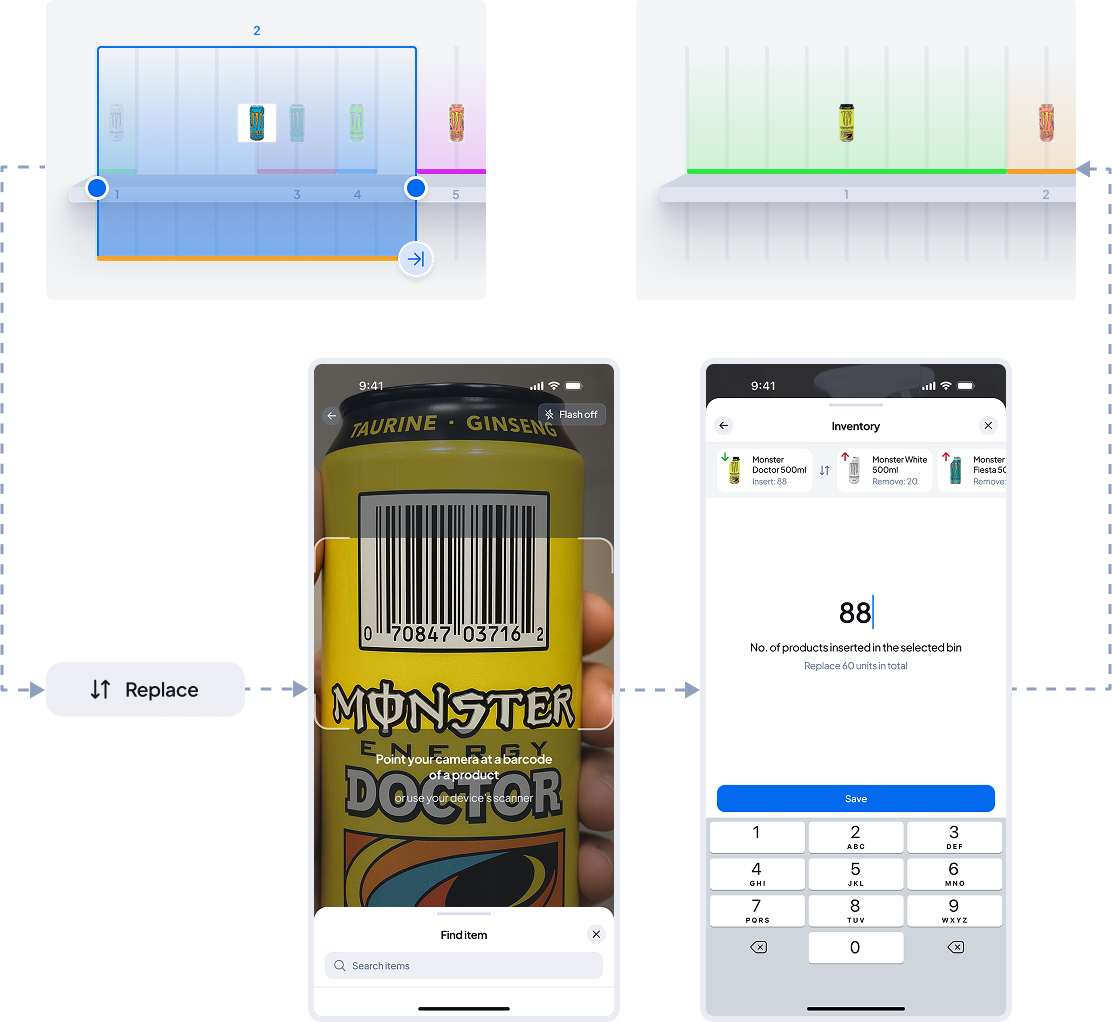
Replace
When you tap Replace, the scanner will open, allowing you to easily scan a product or search for it manually to place it on the shelf in the selected area.
Next, you’ll be asked how many units of the new product you’re placing in the bin. You’ll also see a hint showing which products — and how many — will be removed.
Just like with the Resize action:
- If the new bin fully overlaps existing bins, those products are considered removed from the shelf.
- If it only partially overlaps them, the products are treated as moved to the remaining segments of the original bins.